How to Change Java version in Intelli

In this blog post, You are going to learn to change the java version for
- Intelli Boot Run time to start the application.
- Intelli java project
- maven project.
How to change the java version to the project in Intelli IDE?
Here is a sequence of steps
Go to the File menu
Select Project Structure, An popup window is displayed seen below

Select SDKs under platform Settings
Change the JDK version or add new versions and change to it
This way, It is easy to change the JDK version in the latest Intelli 2021.1.2 Version.
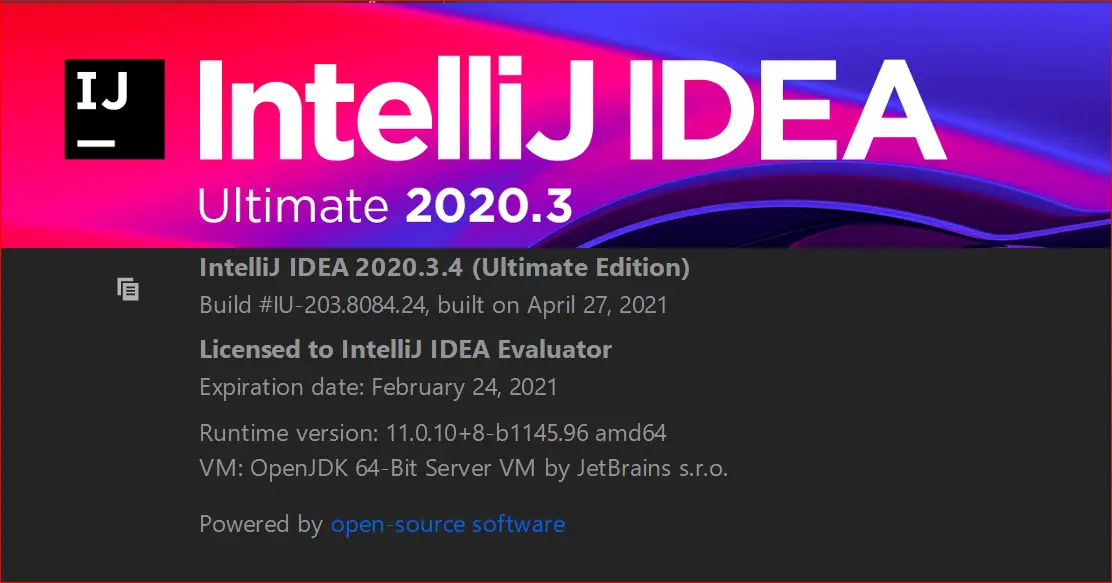
How to change the java runtime used to run Intelli IDE?
Intelli IDE is written in java and uses default java 11 as a runtime.
You can check the current runtime version using the Help Menu - About and displays popup as follows
Sometimes, You want to upgrade or downgrade the Intelli java runtime version. Here are steps to do
Go to the
HelpMenu and Select theFind Actionitem or Shortcut isCtrl + Shift + A.It opens the search box as below and types
Choose Boot Java Runtime for the IDE.
Select this, popup window opened like below

It shows Current and new versions. Please select a value from the new dropdown and clicks Ok
Finally, Restarts Intelli to take the new boot runtime
How to change the java version in the maven project in Intelli?
In the maven project opened in Intelli IDE, Open pom.xml
add maven-compiler-plugin to pom.xml with source and target versions to valid JDK version
<build>
  <plugins>
    <plugin>
      <groupId>org.apache.maven.plugins</groupId>
      <artifactId>maven-compiler-plugin</artifactId>
      <version>3.8.1</version>
      <configuration>
        <source>1.12</source>
        <target>1.12</target>
      </configuration>
    </plugin>
  </plugins>
</build>