Primeng Angular Tutorial with Example

In my previous article, we covered the basics of primeng UI library
In this article, we are going to learn how to set up an angular project with primeng using angular CLI.
Importantly, This tutorial works on all the latest Angular versions including 10,11,12
Learn Angular with primeng components
Angular Cli is a tool to generate an angular project from scratch. It is a code generator for the folder structure of the angular project. The advantage of cli saves a lot of time instead of writing code from scratch and is error-prone as it generates configuration-required files
First, you need to have angular CLI installed globally using this command
npm install @angular/cli -g
Once CLI is installed, please issue the below command to check the version.
B:\angularclidemo>ng --version

     _                      _                 ____ _     ___
    / \   _ __   __ _ _   _| | __ _ _ __     / ___| |   |_ _|
   / △ \ | '_ \ / _` | | | | |/ _` | '__|   | |   | |    | |
  / ___ \| | | | (_| | |_| | | (_| | |      | |___| |___ | |
 /_/   \_\_| |_|\__, |\__,_|_|\__,_|_|       \____|_____|___|
                |___/


Angular CLI: 13.0.3
Node: 14.17.0
Package Manager: npm 7.11.1
OS: win32 x64

Angular: undefined
...

Package                      Version
------------------------------------------------------
@angular-devkit/architect    0.1300.3
@angular-devkit/core         13.0.3
@angular-devkit/schematics   13.0.3
@angular/cli                 13.0.3
@schematics/angular          13.0.3
It shows angular CLI is installed with the latest Angular 13 versions. The next step is to create an Angular project with a CLI tool.
ng new myapp
This creates an angular prototype with all initial configurations and the main module and initial component. Next, go to your project directory, and install the dependencies using the below command
B:\angularclidemo\myapp\ npm install
Once you installed dependencies, start the webserver using the CLI command as below.
ng serve
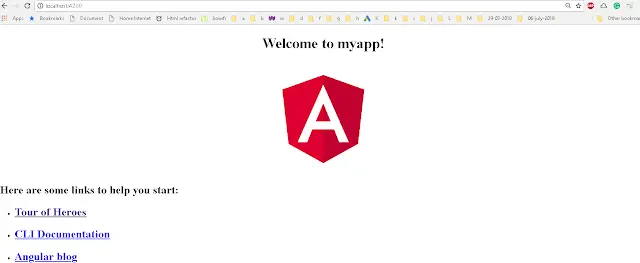
It starts the server listening to 4200. on accessing this http://localhost:4200/ page, you will get the below page as per the screenshot
Install primeng with Angular 13
The next step is to install primeng dependencies, Font awesome is required for primeng installation. Go to the project directory and run the below command
npm install primeng --save
npm install font-awesome --save
This installs required dependencies in the project. This command creates/modifies the following things- added this entry under the dependencies section in package.json
"dependencies": {
  //...
  "font-awesome": "^4.7.0",
    "primeng": "^6.0.2",
},
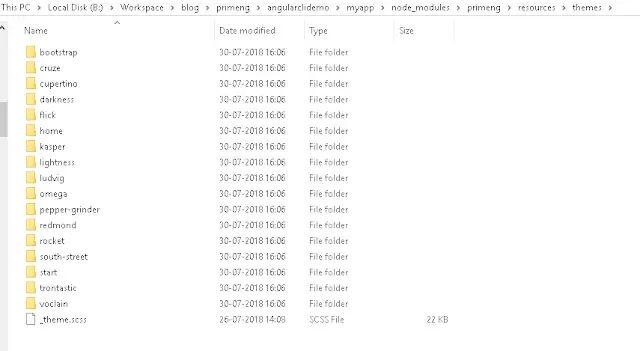
It creates and installs dependencies in the following folder.
myapp\node_modules\font-awesome
myapp\node_modules\primeng
Global Styles configuration
You need to configure primeng styles in the angular application at application using a configuration file. the configuration file is an angular.json file in Angular 13. Angular-cli.json is a project-level configuration file that contains global configuration changes. Add this thing under the style section in angular.json file
"styles": [
  "../node_modules/font-awesome/css/font-awesome.min.css",
  "../node_modules/primeng/resources/themes/omega/theme.css",
"../node_modules/primeng/resources/primeng.css",
we added the theme of Omega, there are a lot of themes(Redmond, rocket, darkness …) available with primeng installation. Please see the complete list of themes
You need to restart after modifying the angular.json file to reflect changes Add primeng components to the angular application Before using components in Angular code, you need to enable the animation module
Add BrowserAnimationsModule
A lot of components are required for the angular animations module to have a better experience. Animation modules are located in @angular/animations module. You need to install this dependency.
npm install @angular/animations --save
Once the animation module is installed, Import BrowserAnimationModule in primeng.module.ts as like below. primeng.module.ts
import { BrowserModule } from "@angular/platform-browser";
import { NgModule } from "@angular/core";
import { PrimengComponent } from "./primeng.component";
import { BrowserAnimationsModule } from "@angular/platform-browser/animations"; // added this

@NgModule({
  declarations: [PrimengComponent],
  imports: [
    BrowserModule,
    BrowserAnimationsModule, // added this
  ],
  providers: [],
  bootstrap: [PrimengComponent],
})
export class PrimengAppModule {}
if you are designing input forms, you need to do statement -
import { FormsModule } from "@angular/forms";
Next, primeng modules BrowserAnimationModule. We are going to add a simple button displaying the Hello World message. We need to add ButtonModule in our application like below.
import { BrowserModule } from "@angular/platform-browser";
import { NgModule } from "@angular/core";
import { PrimengComponent } from "./primeng.component";
import { BrowserAnimationsModule } from "@angular/platform-browser/animations";
import { ButtonModule } from "primeng/components/button/button"; // added this

@NgModule({
  declarations: [PrimengComponent],
  imports: [
    BrowserModule,
    BrowserAnimationsModule,
    ButtonModule, // added this
  ],
  providers: [],
  bootstrap: [PrimengComponent],
})
export class PrimengAppModule {}
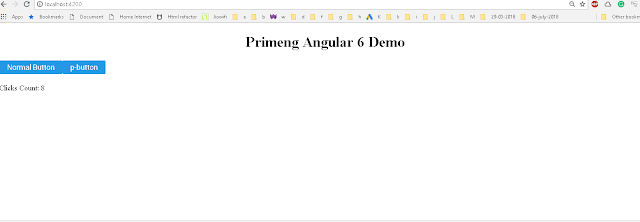
And add buttons in the primeng.component.html file
<div style="text-align:center">
  <h1>Primeng Angular 6 Demo</h1>
</div>
<h4>
  <p-button label="p-button" (onClick)="clickEvent()"></p-button>
  <button
    pButton
    type="button"
    label="Normal Button"
    (click)="clickEvent()"
  ></button>
</h4>
Clicks Count: {{count}}
added click event method in primeng.component.ts
import { Component } from '@angular/core'; @Component({ selector: 'app-root',
templateUrl: './primeng.component.html', styleUrls: ['./primeng.component.css']
}) export class PrimengComponent { count: number = 0; clickEvent() {
this.count++; } }
The first button p-button is the primeng button which has an onClick event handler with brackets surrounded.
the second button is a normal HTML button which added a pButton as an attribute to make it a primeng button here the event is a normal click event with surrounded braces Please note that every primeng component is always prefixed with p. And the output of this application is shown below.
Primeng Aot production support
ng serve These commands create a development bundle, build and deploy with starting the web server. ng build —prod - This builds a bundle for the production code. For production code, debug disabled, static resources minification, etc. ng build —prod —aot This builds bundles code for production with the aot flag enabled. aot is an ahead-of-time compiler for converting HTML and typescript into efficient javascript. primeng added support for aot production deployment too.
Hope you liked my article, Please like and share it on Facebook/Twitter