Running Junit tests with jmockit in eclipse
Junit is a popular unit testing framework and jmockit is used to mock and fake the objects for testing API objects
eclipse is my favorite IDE (integrated development environment) software tool that provides writing, debug, deploy code and existing test cases.
eclipse provides plugins for JUnit and maven plugins
After installing JUnit and Maven plugins to eclipse, we have to do the following steps
JUnit and jmockit jars should be in the project classpath
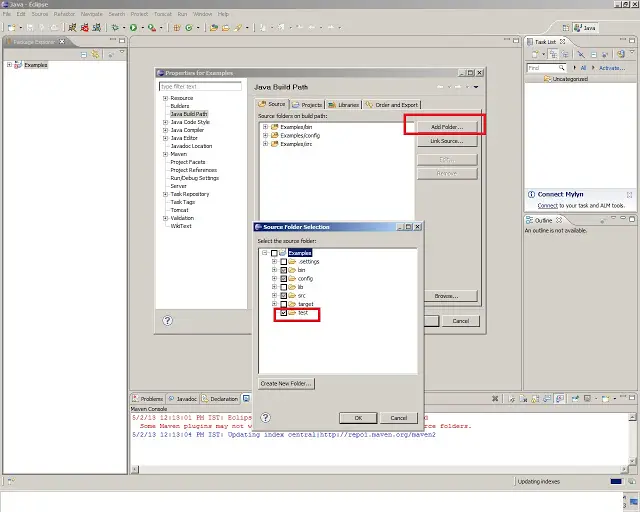
Add the test directory in your project to eclipse project build path, eclipse compiles successfully(‘Use as source folder’).
Please see below screenshot for adding java build path in eclipse
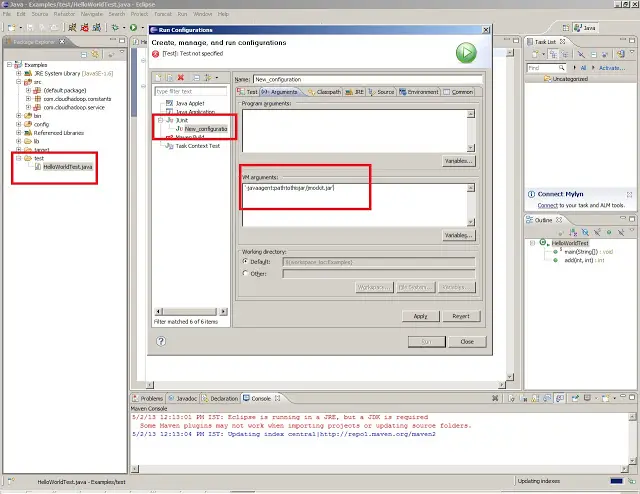
Next step is to add the jmockit configuration to project JVM arguments
To execute the test class, do right-click and select Run dialog (Run As —> Open Run Dialog) and select Junit to execute tests
keep default settings in dialog and create a JUnit test for the class and click on the arguments tab.
Add to vm arguments: with following code
'-javaagent:pathtothisjar/jmockit.jar' (if using Maven, use '-javaagent:${env\_var:HOME}/.m2/repository/jmockit/jmockit/1.0/jmockit-1.0.jar')
- Click ‘Apply’ or click ‘Run’.