How to create maven project with command line | Eclipse | Intelli

Maven is a helpful build tool designed for Java projects, significantly speeding up the development build process. It plays a key role in continuous build integration for Java applications.
Maven organizes tasks into predefined phases or goals, which are comparable to ant targets. Developers invoke these goals to execute specific tasks. For more insights into Maven commands, you can explore my other posts on maven commands.
Before diving in, ensure you’ve downloaded Maven from the Apache software and installed it. If you’re unsure how to proceed, check out the install maven guide.
What considerations should you keep in mind when implementing Maven as the build tool for your Java projects?
- project object model file
- java project folder structure
Create a maven project using the command line
To begin, create a Maven template project using the maven archetype plugin. This plugin provides various templates for web applications, Java applications, and enterprise applications.
archetype:generate is an actual goal to provide with archetypeArtifactId=maven-archetype-quickstart which generates jar based java application
 mvn archetype:generate -DgroupId=com.techrocksz -DartifactId=HelloWorld -DarchetypeArtifactId=maven-archetype-quickstart -DinteractiveMode=false

The output of this mvn command:-

E:\techrocksz>mvn archetype:generate -DgroupId=com.techrocksz -DartifactId=HelloWorld -DarchetypeArtifactId=maven-archetype-quickstart
[INFO] Scanning for projects...
[INFO] Searching repository for plugin with prefix: 'archetype'.
[INFO] ------------------------------------------------------------------------
[INFO] Building Maven Default Project
[INFO]    task-segment: [archetype:generate](aggregator-style)
[INFO] ------------------------------------------------------------------------
[INFO] Preparing archetype:generate
[INFO] No goals needed for project - skipping
[INFO] Setting property: classpath.resource.loader.class => 'org.codehaus.plexus.velocity.ContextClassLoaderResourceLoader'.
[INFO] Setting property: velocimacro.messages.on => 'false'.
[INFO] Setting property: resource.loader => 'classpath'.
[INFO] Setting property: resource.manager.logwhenfound => 'false'.
[INFO] [archetype:generate]
[INFO] Generating project in Interactive mode
Define value for version:  1.0-SNAPSHOT: : 1.0.0-SNAPSHOT
Confirm properties configuration:
groupId: com.techrocksz
artifactId: HelloWorld
version: 1.0.0-SNAPSHOT
package: com.techrocksz
 Y: : Y
[INFO] ----------------------------------------------------------------------------
[INFO] Using the following parameters for creating OldArchetype: maven-archetype-quickstart:1.0
[INFO] ----------------------------------------------------------------------------
[INFO] Parameter: groupId, Value: com.techrocksz
[INFO] Parameter: packageName, Value: com.techrocksz
[INFO] Parameter: package, Value: com.techrocksz
[INFO] Parameter: artifactId, Value: HelloWorld
[INFO] Parameter: basedir, Value: E:\techrocksz
[INFO] Parameter: version, Value: 1.0.0-SNAPSHOT
[INFO] ********************* End of debug info from resources from generated POM ***********************
[INFO] OldArchetype created in dir: E:\techrocksz\HelloWorld
[INFO] ------------------------------------------------------------------------
[INFO] BUILD SUCCESSFUL
[INFO] ------------------------------------------------------------------------
[INFO] Total time: 30 seconds
[INFO] Finished at: Fri Dec 02 10:47:29 GMT+05:30 2011
[INFO] Final Memory: 8M/254M
[INFO] ------------------------------------------------------------------------
The above command created the HelloWorld application,
First Go to the Project directory structure.
In the root folder, we have a folder named src and file pom.xml. and also we have the following subdirectories
src\\main\\java:- This folder contains all your java classessrc\\test\\java: This folder contains all your java test related classes- and also we have com\techrocksz\App.java and com\techrocksz\AppTest.java files which is a HelloWorld application and its test class.
Sample created pom.xml with command line:-
Maven utilizes the pom.xml file, which holds comprehensive details about your project, including configuration settings.
The pom.xml file serves as the Project Object Model configuration file.
<project xmlns:xsi="http://www.w3.org/2001/XMLSchema-instance" xmlns="http://maven.apache.org/POM/4.0.0" xsi:schemalocation="http://maven.apache.org/POM/4.0.0 http://maven.apache.org/maven-v4_0_0.xsd">
  <modelversion>4.0.0</modelversion>
  <groupid>com.techrocksz</groupid>
  <artifactid>HelloWorld</artifactid>
  <packaging>jar</packaging>
  <version>1.0.0-SNAPSHOT</version>
  <name>HelloWorld</name>
  <url>http://maven.apache.org</url>
  <dependencies>
    <dependency>
      <groupid>junit</groupid>
      <artifactid>junit</artifactid>
      <version>3.8.1</version>
      <scope>test</scope>
    </dependency>
  </dependencies>
</project>
In the above,
In the provided information:
groupId: Represents the package of the project where the ExampleDemo-1.0.0.jar file is created.
artifactId: Is the project name as well as the name of the JAR/WAR module.
packaging: Specifies whether this module is a web application (WAR) or a Java module (JAR). If the packaging option is not specified, Maven considers it as a JAR module.
dependencies: This tag specifies the dependencies that this project has. In this case, by default, the JUnit dependency is added as part of the sample project because we have written “App” under dependencies.
Running Maven Project:
Here are the steps to run a maven project and install all dependencies.
- First, go to the application using
cd HelloWorld. - Next, run the
mvn clean installcommand to clean, compile and install dependencies.
maven execution process:
As we’ve seen, the repositories location and dependencies are configured in the pom.xml file.
When you run mvn clean install for the first time, Maven attempts to download various plugins and dependencies from the repository. It then copies these dependencies to a folder within your user profile directory (commonly located at C:\Documents and Settings\username\.m2\repository).
This initial process can be time-consuming because it needs to download all your plugins to your local repository. However, in subsequent runs, Maven will only download the JARs that haven’t been downloaded before, making the execution faster.
Below is the output of the command.
`E:\techrocksz\HelloWorld>mvn clean install
[INFO] Scanning for projects...
[INFO] ------------------------------------------------------------------------
[INFO] Building HelloWorld
[INFO]    task-segment: [clean, install]
[INFO] ------------------------------------------------------------------------
[INFO] [clean:clean]
[INFO] Deleting directory E:\techrocksz\HelloWorld\target
[INFO] [resources:resources]
[WARNING] Using platform encoding (Cp1252 actually) to copy filtered resources, i.e. build is platform dependent!
[INFO] skip non existing resourceDirectory E:\techrocksz\HelloWorld\src\main\resources
[INFO] [compiler:compile]
[INFO] Compiling 1 source file to E:\techrocksz\HelloWorld\target\classes
[INFO] [resources:testResources]
[WARNING] Using platform encoding (Cp1252 actually) to copy filtered resources, i.e. build is platform dependent!
[INFO] skip non existing resourceDirectory E:\techrocksz\HelloWorld\src\test\resources
[INFO] [compiler:testCompile]
[INFO] Compiling 1 source file to E:\techrocksz\HelloWorld\target\test-classes
[INFO] [surefire:test]
[INFO] Surefire report directory: E:\techrocksz\HelloWorld\target\surefire-reports

-------------------------------------------------------
 T E S T S
-------------------------------------------------------
Running com.techrocksz.AppTest
Tests run: 1, Failures: 0, Errors: 0, Skipped: 0, Time elapsed: 0.047 sec

Results :

Tests run: 1, Failures: 0, Errors: 0, Skipped: 0

[INFO] [jar:jar]
[INFO] Building jar: E:\techrocksz\HelloWorld\target\HelloWorld-1.0.0-SNAPSHOT.jar
[INFO] [install:install]
[INFO] Installing E:\techrocksz\HelloWorld\target\HelloWorld-1.0.0-SNAPSHOT.jar to C:\Documents and Settings\kinturu\.m2\repository\com\techrocksz\HelloWorld\1.0.0-SNAPSHOT\HelloWorld-1.0.0-SNAPSHOT.j
ar
[INFO] ------------------------------------------------------------------------
[INFO] BUILD SUCCESSFUL
[INFO] ------------------------------------------------------------------------
[INFO] Total time: 5 seconds
[INFO] Finished at: Fri Dec 02 11:58:46 GMT+05:30 2011
[INFO] Final Memory: 15M/254M
[INFO] ------------------------------------------------------------------------
`
Finally, your module HelloWorld-1.0.0-SNAPSHOT.jar is created.
How to configure Proxy Settings in the maven application
settings.xml has to be created in folder C:\\Documents and Settings\\username\\.m2\\.
Here is a sample settings.xml example
<proxies>
    <!-- Http Proxy setting configuration-->
    <proxy>
        <id>optional</id>
        <active>true</active>
        <protocol>http</protocol>
        <username>proxyuser</username>
        <password>proxypass</password>
        <host>proxy-hostname.com</host>
        <port>80</port>
        <nonProxyHosts>otherhosts.com</nonProxyHosts>
    </proxy>
    <!-- HTTPS Proxy configuration details -->
    <proxy>
        <id>optional</id>
        <active>true</active>
        <protocol>https</protocol>
        <username>username</username>
        <password>password</password>
        <host>proxy-hostname.com</host>
        <port>80</port>
        <nonProxyHosts>otherhosts.com</nonProxyHosts>
    </proxy>
</proxies>
How to create a java web application in eclipse?
Creating a project in Eclipse is a straightforward process.
Here are step by steps
- In the File menu, Select New Project, It opens a new window as seen below

Select Maven - Maven Project
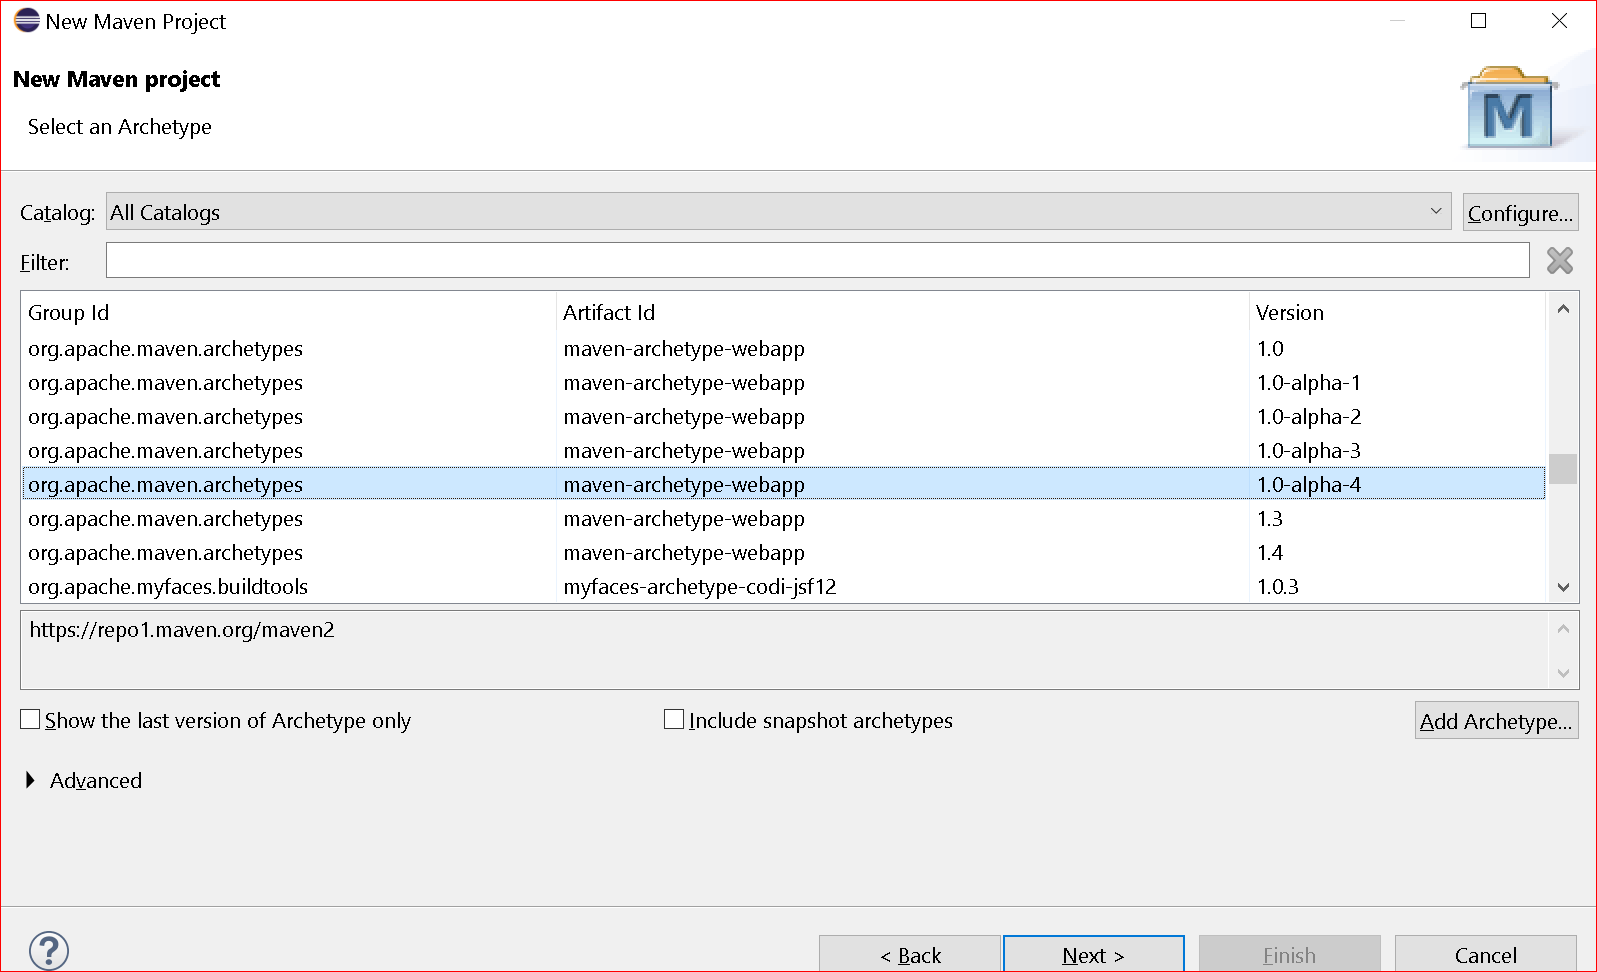
- Click the Next button, Select defaults in the next window, An window shows
Select an Archetypeas seen below
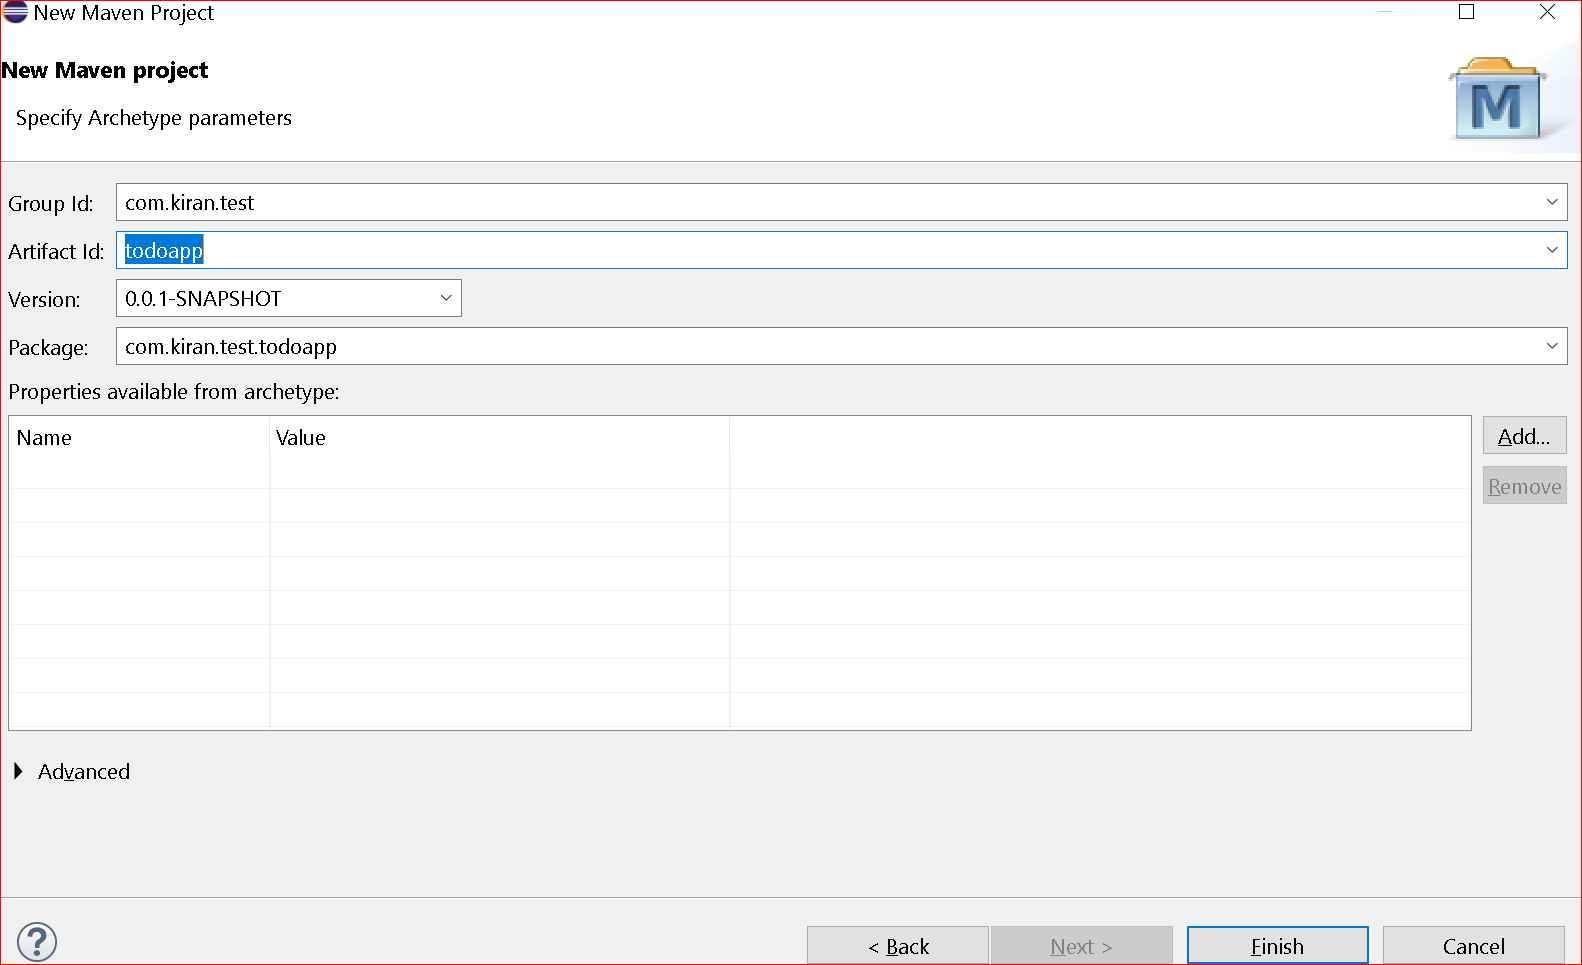
- Next window, Please enter
Group Id,Artifact Id, andversiondetails